WE ARE STARTING A NEW KITCHEN RENOVATION!

WE ARE STARTING A NEW KITCHEN RENOVATION!


I am very excited to be able to start on a kitchen renovation at our house. Yay! I look at everything interior design daily. I enjoy seeing the new kitchen trends with different colored cabinets gray, black, navy, green. Brass (kinda new) and black hardware. I’m feelin’ it… I’m feelin’ it.

credit: @elizabethlawsondesign instagram

credit: @heidilachepelleinteriors instagram

credit: @jillianharris instagram

But ya know, I still got love for an all white kitchen. There is just something about an all white kitchen that can’t be beat. That bright, open airy, so fresh and so clean feel is what I want to exude in my own home. I think I’m going to stick to a white kitchen and enjoy the new trends via instagram for now.

credit: @studiomcgee instagram

I am really drawn to a very modern minimalist style home. I love the thought of replacing these cabinets all together with plain sleek lacquer cabinets and bringing in a more modern look in the mix.

credit: @homeadore instragram

I also really love the shaker style or shaker style like cabinets. I am thinking of refacing our existing cabinets. It is very versatile so it can work with many styles such as modern, classic, farmhouse, rustic, etc.

credit: @studiomcgee instagram

The current cabinets in our house are very traditional. I didn’t like them at all at first and I really wanted to reface them with a shaker style cabinets that would work well with a modern and classic kitchen. I am really considering to just have them painted so that we can save a lot of money on the cabinets. Then we can splurge on countertops and appliances.

credit: @coastalinteriors instagram

So those are our choices. Replace, Reface or Paint. What should we do? That is the question. I’ll keep you posted on what I decide.

xoxo,

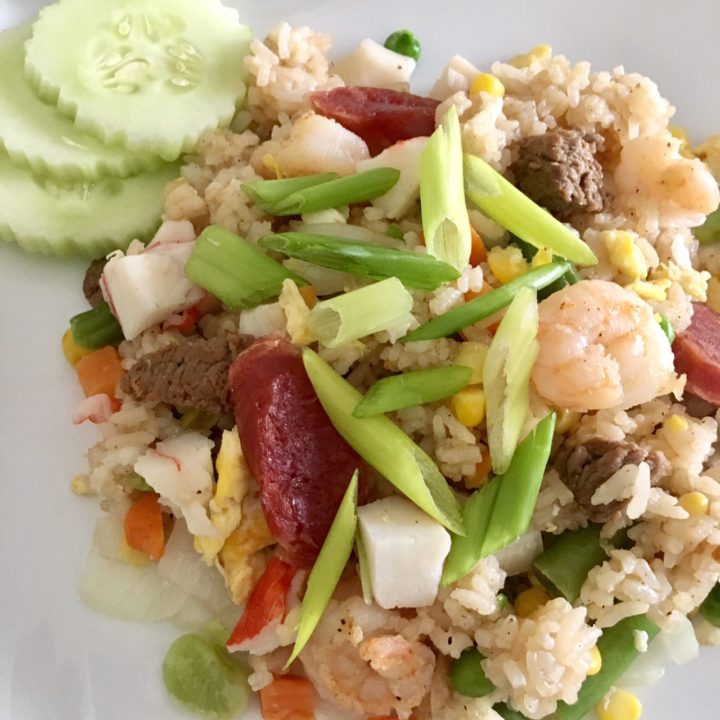
COMBINATION FRIED RICE

COMBINATION FRIED RICE

I can’t count how many times I’ve tried to make fried rice and have FAILED. I’ve cooked the eggs IN the rice. (apparently a no no) It was mushy. I’ve burned the rice. I’ve burned the eggs. I got the advice to cook everything separately. Great advice…Stepping stone. But then there was the problem of it tasting…meh. However, each time after I experimented with sauces and seasoning it started tasting better and better. For this recipe, I just happen to have a little bit of everything (shrimp, imitation crab, steak, Chinese sausage) in the fridge and thought I’d throw them together and make a “house/combination” fried rice. I tried to write down how much I used as accurately as possible. But, like I said, I threw it together with what I already had in the fridge. I really love how it turned out and want I share it with you. (So good!) 

Fried Rice 

6 Servings 

Ingredients 

1 lb bag frozen veggies (carrots, corn, peas, lima beans)

1/2 onion (chopped) 

green onions

cucumbers 

1 cup shrimp

1 cup steak 

1 cup imitation crab

3 eggs

3 pcs Chinese sausage 

4 cups jasmine rice (cooked) 

1/4 tsp black pepper 

1/4 tsp garlic fresh or seasoning 

1/4 tsp ginger fresh or seasoning

1/2 tsp msg

1/2 tsp salt 

1 tsp fish sauce 

1 tbsp soy sauce 

1 tbsp oyster sauce 

1 tbsp hoisin sauce 

1 1/2 tbsp butter 

Cooking instructions 

Rinse and cook jasmine rice in rice cooker or as directed in a pot. Boil Chinese sausage for 15 minutes in a separate pot. While rice and sausage is cooking, use a pan to sauté frozen veggies with vegetable oil and season with a pinch of salt and pepper. Transfer veggies to large serving bowl. 

Cook onions and transfer to serving bowl. (I don’t cook the frozen veggies with onions cause I want to make sure the frozen veggies are thoroughly cooked (but not soggy) and I don’t like to over cook onions) 

Note: Use little vegetable oil (or olive oil) as possible without burning. Very lightly salt and pepper each time you sauté an ingredient. You’ll be seasoning almost each ingredient throughout the process and do not want it to be too salty in the end. You’ll be mixing all the ingredients in the same large serving bowl after cooking each ingredient. 

Moving along. Next, scramble eggs into a bowl and then scramble in the pan with a pinch salt and pepper. Transfer to the same large bowl. Using the same pan, cook shrimp in oil and pinch of salt and pepper. (Clean in between cooking if you need to or have an extra pan available to cook with) Transfer shrimp to large bowl. Next cook steak in pan with oil (leave for a few minutes to brown) and add a pinch of salt and pepper. 

When the Chinese sausage is done boiling, drain water and slice them. Lightly sauté the sausage in a pan and transfer to serving bowl. Cut imitation crab into small cubes and microwave for 30 minutes. Add to large bowl. 

For the rice: Turn on low medium setting. Add butter into a pan, add garlic and ginger. Mix quickly. Then add rice. Add salt, pepper, msg, soy sauce, fish sauce, oyster sauce, hoisin sauce. Mix well and let cook and keep mixing for a few minutes. Transfer the rice into bowl. Mix all of the cooked ingredients together. You can serve as is or serve with chopped green onions on top and sliced cucumbers in the side. 

Enjoy! 

XOXO, 

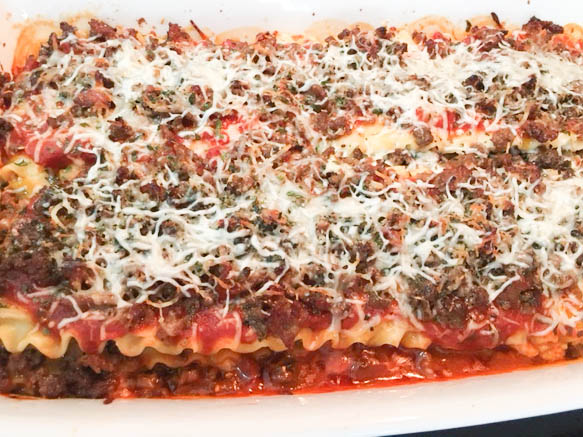
HEARTY SAUSAGE AND BEEF LASAGNA

HEARTY SAUSAGE AND BEEF LASAGNA

Hearty Sausage and Beef Lasgna

Ingredients

1 package lasagna, uncooked

1 jar marinara sauce

1 lb ground Italian sausage

1 lb ground beef

1 8 oz fresh mushrooms

1 32 oz ricotta cheese

1 8 oz/2 cups Italian style cheese

1 egg, beaten

1/2 tbsp parsley

1/2 tbsp basil pesto

1 tsp sugar

1/4 tsp nutmeg

salt and pepper

dried basil

dried parsley

Preparation and cooking instructions

Preheat oven to 375 degrees. Cook pasta according to package directions. Drain and layer pasta on a cookie sheet with wax paper in between to keep from sticking. Cook sausage and set aside. Cook beef and set aside. Cut and cook mushrooms. Set aside. In large bowl, mix ricotta cheese, egg, parsley flakes, basil pesto, nutmeg, sugar, salt and pepper to taste. Set aside. Pour 1 1/3 cups of sauce on the bottom.

Layer with pasta, ricotta cheese mix, mix Italian cheese, sausage and beef. Repeat layers. Add another pasta layer at top and the rest of the marinara sauce, sausage and beef.

Cover with aluminum foil and cook for 30 minutes. Uncover aluminum foil. Sprinkle Italian cheese top. Sprinkle with basil and parsley. Recover with aluminum foil and cook for 10 more minutes. Let rest for 5 minutes before slicing.

xoxo,

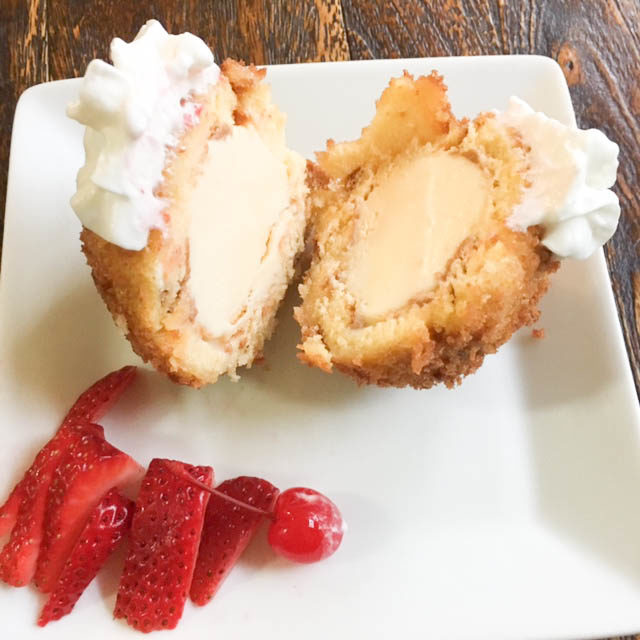
FRIED ICE CREAM

FRIED ICE CREAM

This dessert is so so delicious and is a must try! That is all.

Ingredients

Makes 6 servings

vanilla ice cream

pound cake

egg

panko/Japanese style bread crumbs

vegetable oil

whip cream

cherry

Preparation instructions

Cut slices of pound cake into 1/4″ wide. Lay out pound cake and gently press together.

Scoop ice cream and place in the center.

Wrap pound cake around ice cream and mold into a ball. Be sure the ice cream in fully covered. You can use extra pieces of pound cake to fill up any holes.

Cover with plastic wrap or sandwich bag. Freeze until pound cake has hardened. (I kept them in the freezer over night. 30 mins to an hour should be good) Repeat steps with the rest of the pound cake.

Cooking instructions

Preheat vegetable oil in deep fryer  to 350 degrees Mix egg in bowl. Pour panko into a plate .Take ball of pound cake/ice cream out of the freezer.

Coat with egg.

Coat with panko.

Deep fry for 15-20 seconds or until golden brown. 

Add toppings of your choice such as chocolate syrup, whip cream, strawberries and cherries.

Enjoy! Enjoy! Enjoy!

xoxo,

HOME TOUR: COLORFUL TODDLER BOY BEDROOM

HOME TOUR: COLORFUL TODDLER BOY BEDROOM

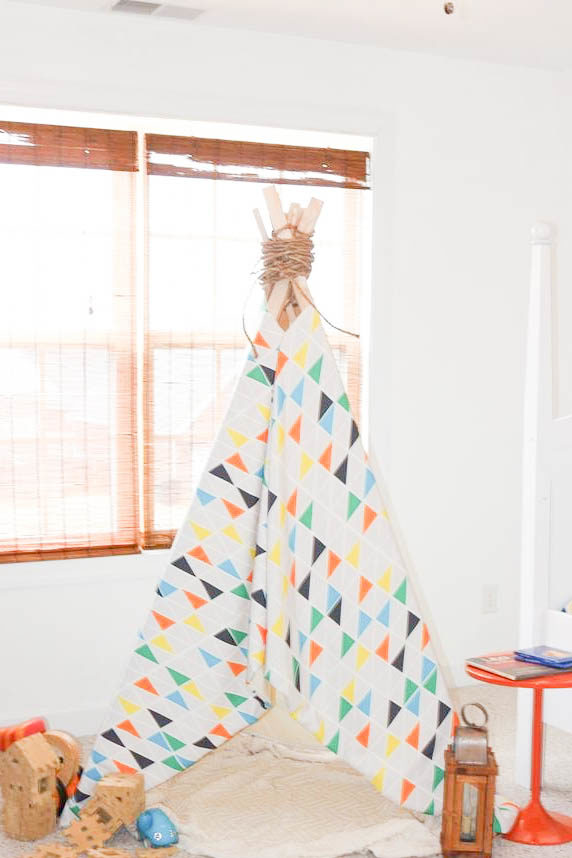
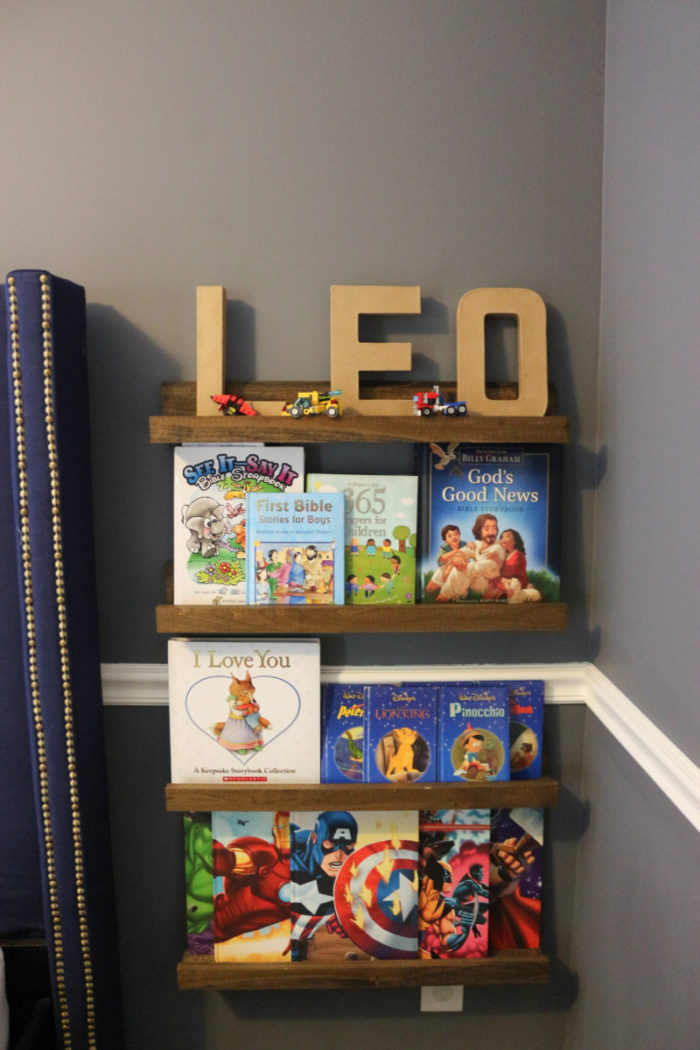
Today, I’m reminiscing about this bright and airy colorful bedroom. Back when my youngest son was a toddler and we lived in our previous house. I am so thankful that we were able to use alot of the decor from this toddler bedroom in his “big boy” bedroom that was featured in a post previous post Interior: Home Tour-Colorful Boy Bedroom

My amateur photography skills do not do this room justice. It was always gave me a little joy walking in this room. I designed the room around the artwork collection I designed for Deny Designs.

This bed is crib/toddler bed is by Bratt Decor. It was originally black but I painted it white for this makeover. 

The dresser is from Target. It was also originally black. I painted it blue for the makeover. This fabric garland was also a diy using fabric and rope that I already had.

Twin sheet and pillow set Deny Designs

Duvet Cover (used for tee pee cover ) Deny Designs

Tray Deny Designs

Lighting Urban Outfitters

Bed Bratt Decor repainted white

Dresser Target repainted blue

Rug Bargain Hunt similar ones Rugs USA

xoxo,

BEFORE AND AFTER: ALL PINK TO COLORFUL BOY BEDROOM

BEFORE AND AFTER: ALL PINK TO COLORFUL BOY BEDROOM

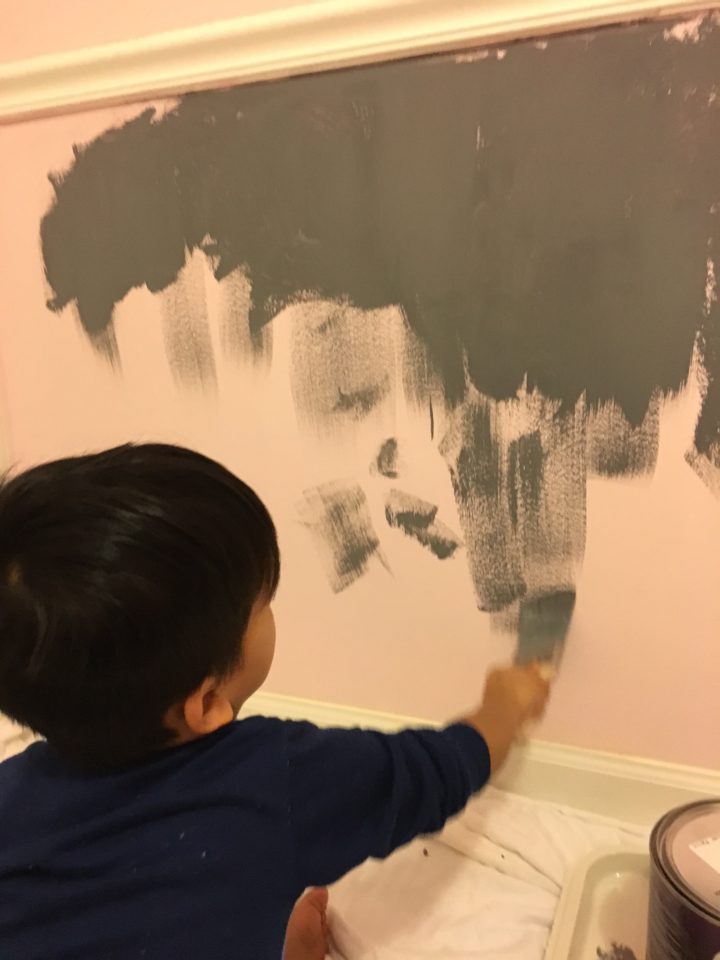
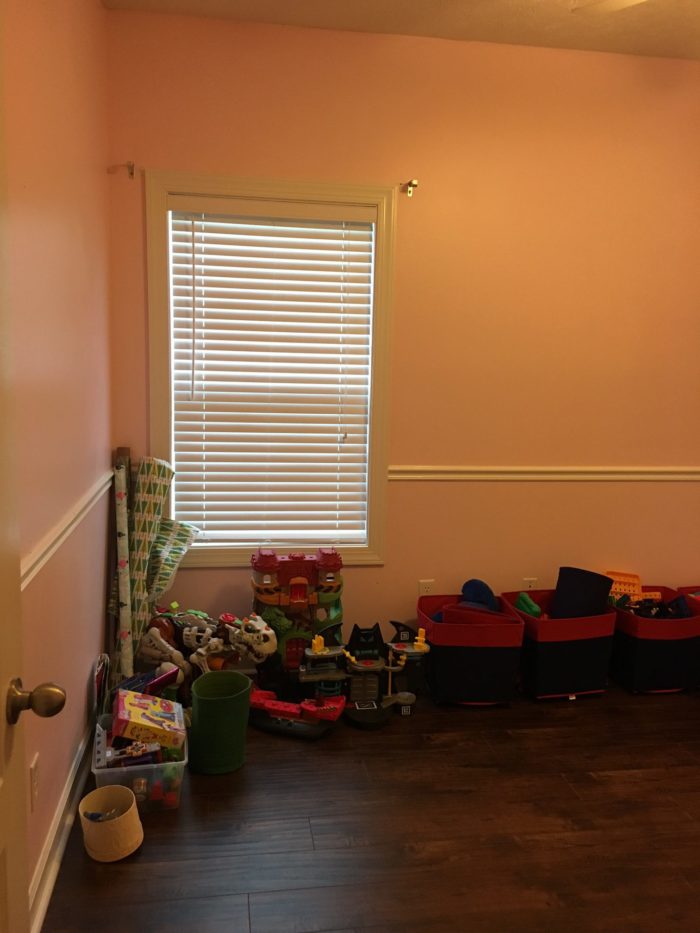
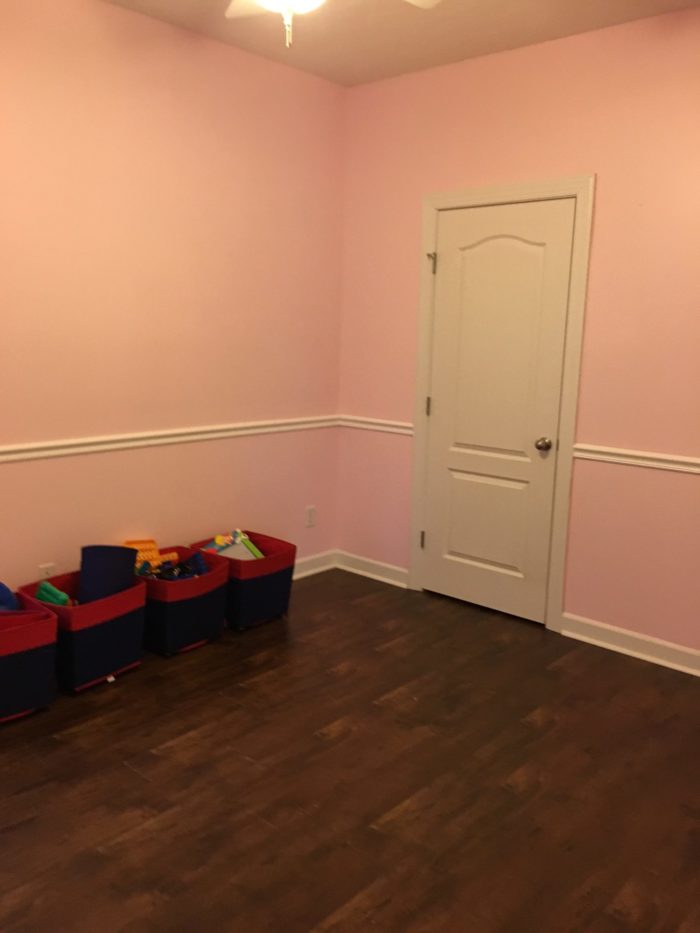
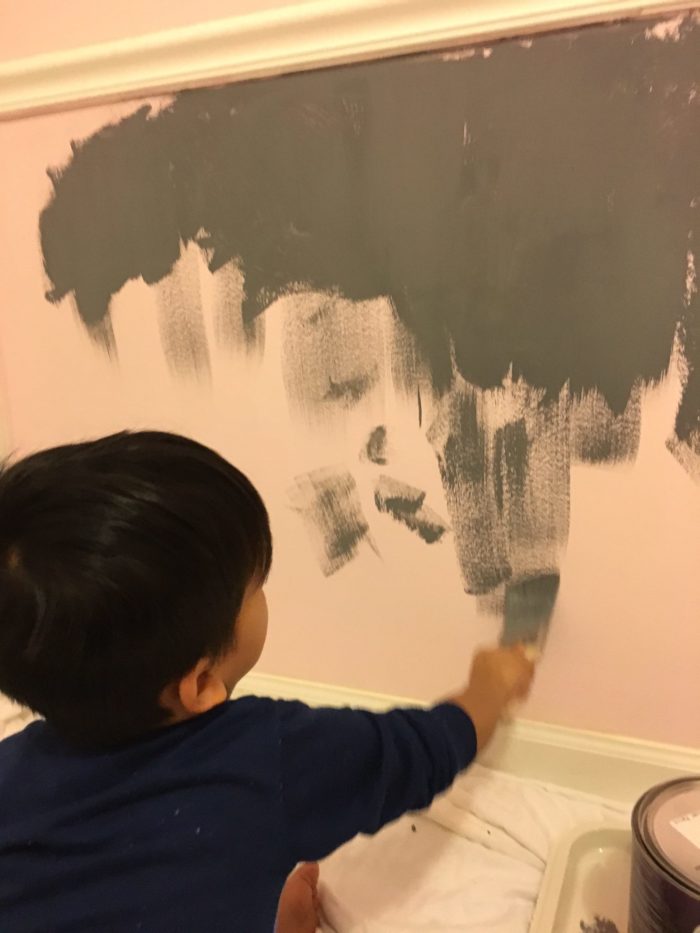
If you’ve read my post Home Tour: Colorful Boy Bedroom you may remember that my 5 year old son, at the time, was confused that as to why his new bedroom was pink. He was so ready to help when it came time to paint his bedroom. Here are some before and after pictures of his bedroom. The paint in his new bedroom is Benjamin Moore “Smoke Gray”.

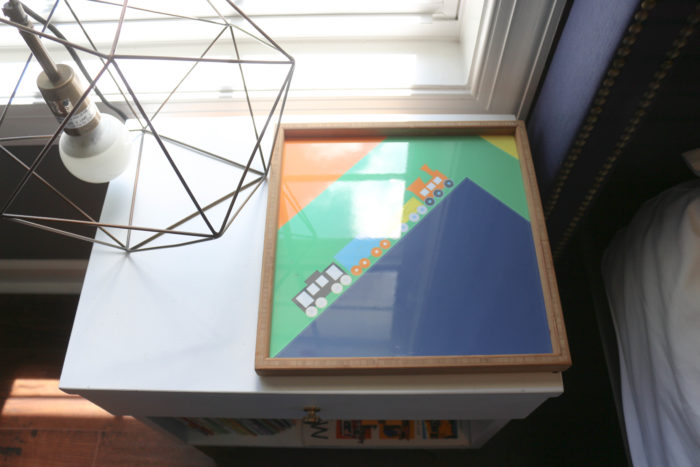
Train tray – Deny Designs

Train Chevron Pillow (Comes in Sheet Set) – Deny Designs

Triangles Duvet Cover – Deny Designs

xoxo,

DIY REPURPOSE OUTDOOR LANTERN INTO INDOOR LAMPS

DIY REPURPOSE OUTDOOR LANTERN INTO INDOOR LAMPS

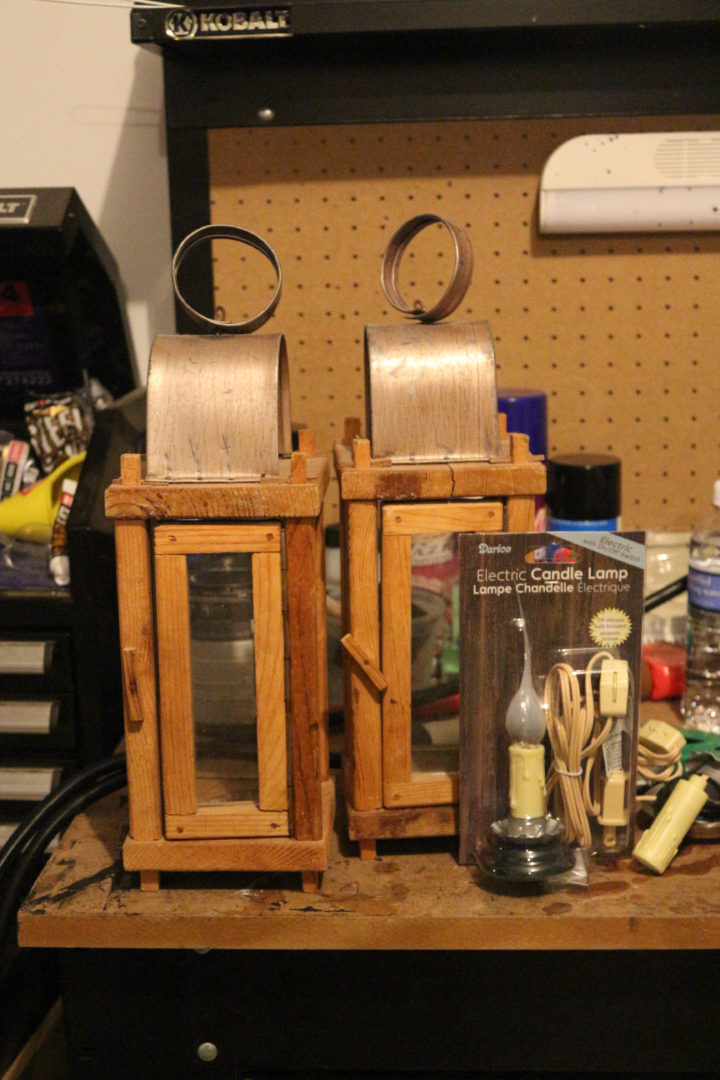
I found these outdoor oil lanterns at a yard sale several years ago. “They are replicas of lanterns used during the Civil War” – That is what I was told by the seller. I thought, hmm that’s cool. They also looked great and they were $3 each. Sold. Although, I never used them outdoors as lanterns. I did use them as decorative accents inside the house. Then I ended up storing (hoarding) them with my other home decor things for a few years after. Finally, I made over my son’s room and added an antique trunk as his side table. I brought the lanterns back out and thought they would be a nice addition to the “old world” look I wanted for the room.

When I found this electric candle lamp at Michael’s , I thought it would be fun to turn the outdoor lanterns into functional lamps.

My friend helped me with this project as he is knowledgeable in rewiring and electrical things. I am not.

Tools Needed

wire cutters

splice grips

electric tape

Steps

Remove light bulb.

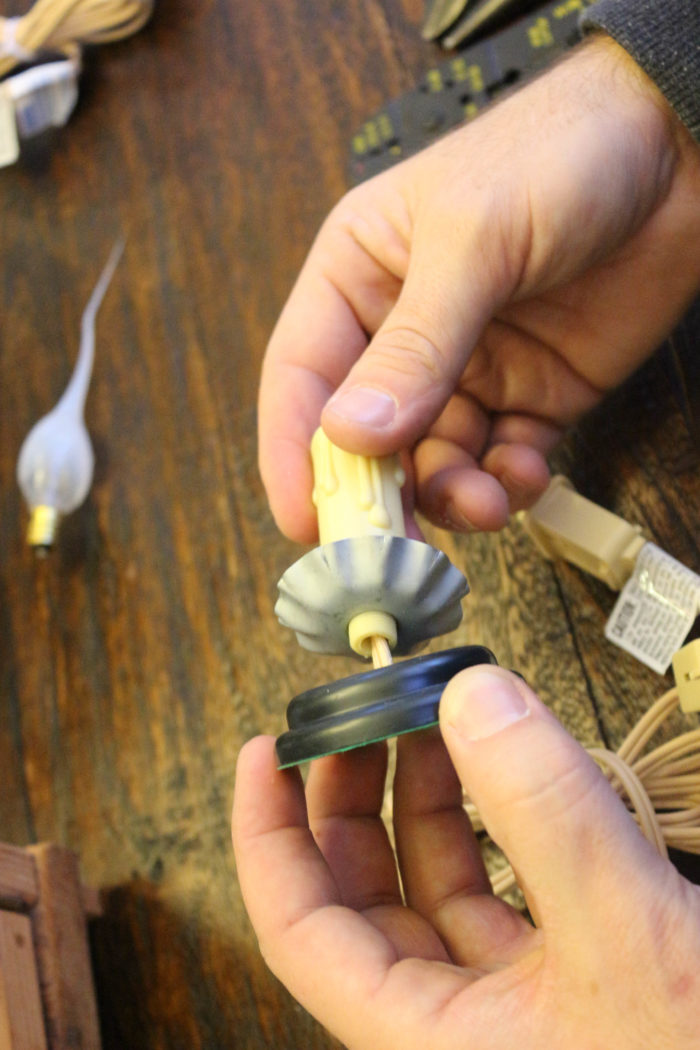
Remove faux candle stick from base.

Cut wires with wire cutter.

Loop bottom part of cut wire through bottom of lantern.

Cut and remove the rubber wire and leave a slack of electric wire.

Repeat on all cut ends of the wires.

Loop bottom wires through candlelight stand/base, from bottom to top.

Connect and wrap electric wires around each other.

Press down and in on the wires with splice grips. Cover wires by wrapping them with electric tape.

Place candle back on top of stand.

Screw candle light/light bulb back onto candle stick.

Place light in the lantern. 

Plug in to make sure it works…and…Voila! Let there be light.

Repeat the same steps for the second lamp. 

Here is a picture of the lamp in my son’s bedroom when were at our previous house.

Here is a picture of the lamp in my son’s bedroom in our current house.

I love love these lamp! They add so much character. They are now functional in the space that they’re in, instead of just being decorative. This is what started my obsession of wanting to turn everything into lighting fixtures. So…heads up, there will be more DIY lighting posts in the future. If you are up for a diy lighting project, I bet there are things that you already have in your home that you can turn into a lighting fixture. If you want more ideas on diy lighting, I will have more posts for you soon. Be sure to sign up to get posts emailed to you if you don’t want to miss any posts.

xoxo,

BEFORE AND AFTER: TWEEN BOY BEDROOM

BEFORE AND AFTER: TWEEN BOY BEDROOM

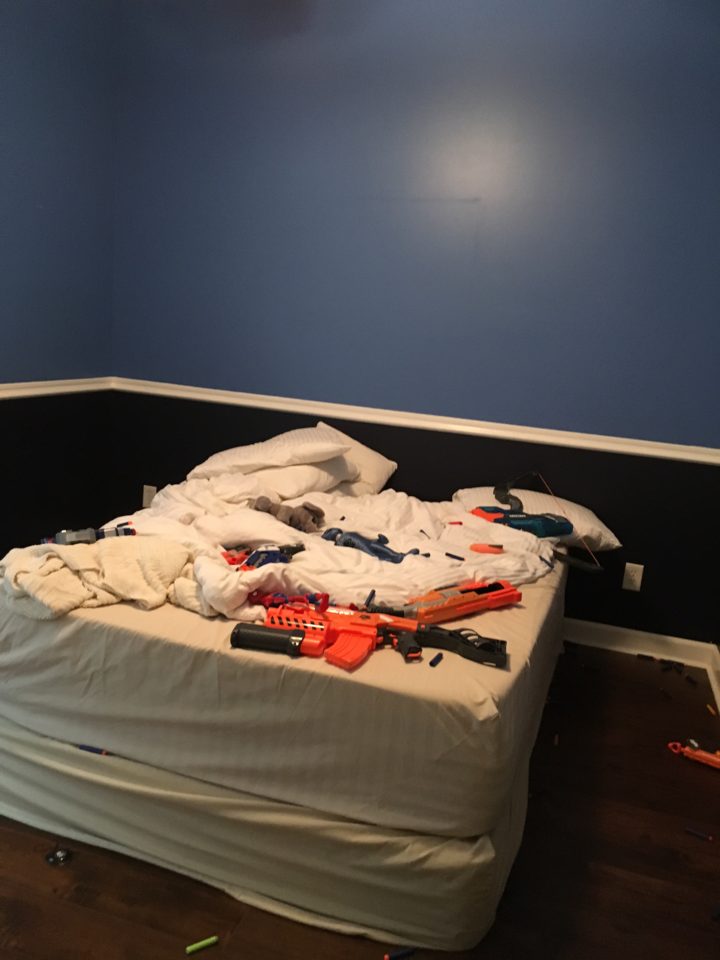
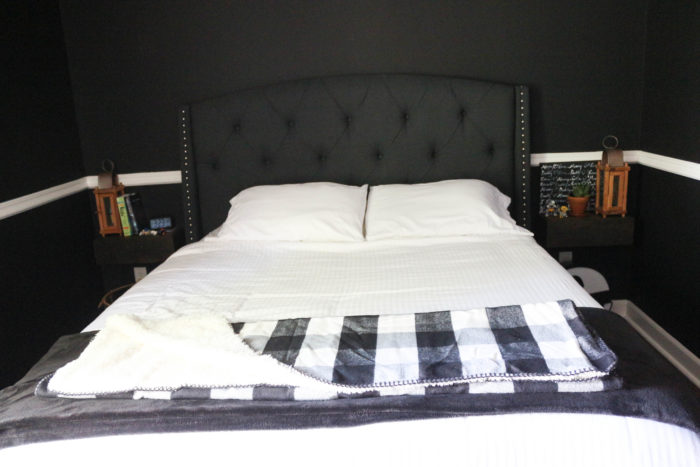
This room was blue and navy blue when we moved in. I was glad that my son wanted to paint a dark color since it was already dark. Which means less painting involved than having to cover up the old paint. He chose Benjamin Moore “Universal Black” for the walls. I love the new paint color! It was a great choice by my tween who loves the color black. I guess he takes after his mom. Again, excuse the mess. The boys were literally in the middle of a nerf gun war while I was trying to take these picture. P.S. Sorry I didn’t do a better job coordinating the before and after pictures, but that’s all I have. Can’t go back now! Haha.

xoxo,

EGG ROLLS

EGG ROLLS

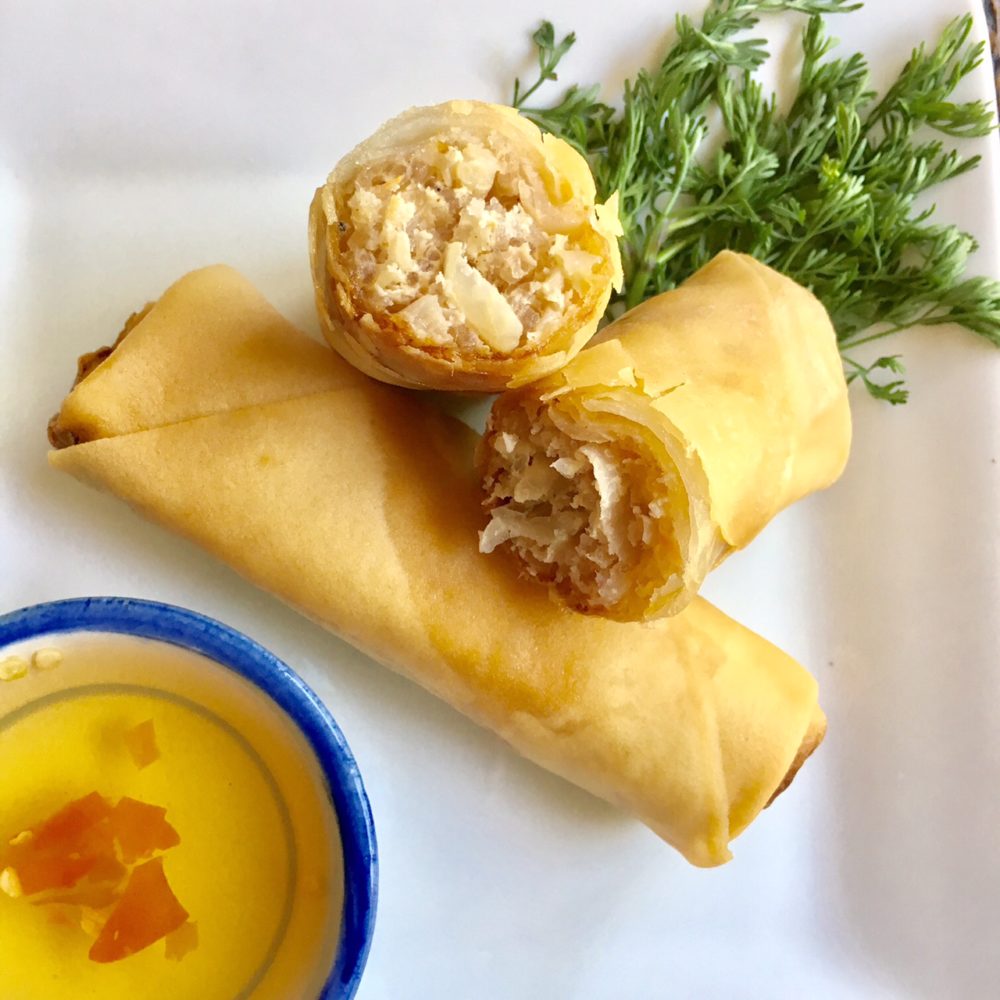
Egg rolls! The Asian party go to appetizer. Yeah! When I make egg rolls, chances are, my neighbors or other friends are getting egg rolls. I love thy neighbor with egg rolls. Here is my recipe that you can share with your friends and family. If you want to keep it all for yourself, put the rest of the wrapped egg rolls and freeze to cook later. 

Egg rolls

Ingredients 

Makes about 50 pcs

2 packages spring roll pastry 

1 lb ground turkey (or ground pork) 

1 16 oz package cole slaw mix 

1 whole onion 

1 stalk celery 

1 8 oz can water chestnuts

1 pack 10.5 oz vermicelli bean thread noodles 

2 eggs

1 tsp salt 

1/2 tsp black pepper

2 tbsp oyster sauce 

vegetable oil or peanut oil 

Here is a picture for reference 

Preparation instructions 

In a large mixing bowl, soak half of packaged noodles in water for about 10 minutes. 

Chop water chestnuts, celery, onion. I use this hand chopper to make it easier. 

Strain noodles. Cut into 1 inch strands. Set aside. 

In large mixing bowl, add ground turkey cole slaw mix, water chestnuts, noodles, 1 egg, salt, pepper, oyster sauce. Mix well. 

Crack egg into a separate small bowl (in the pictures I used only egg white at first, but found the pastry wasn’t sticking so add the yolk. Forgot this. Oops) Mix egg. Open packages of spring roll pastry. Peel and separate each piece. Set aside. On a plate, lay 1 sheet of spring roll pastry flat with one corner facing towards you.

Scoop a heaping spoonful of the turkey/vegetable mixture onto the corner of the pastry.

Roll corner up and over once.

Fold side corners in.

Roll up more leaving one corner open.

Dip the open corner into egg.

Press the corner onto egg roll.
Set aside on a plate and repeat for the rest of the pastry. 

Cooking instructions 

Prepare deep fryer. Fill up half of the pot with oil. Turn heat on to 400 degrees. Wait for oil to get hot. Add egg rolls. Don’t fill with too much at one time. Leave room so that they won’t stick together and you can turn egg rolls easily. Let cook for 10-15 minutes or until they are floating in oil and are golden brown in color.

Take one out and check if the meat is fully cooked. Get a plate or basket and lay a few pieces of paper towels or napkin on it. Pick up egg rolls out of the deep fryer and let the oil drain well. Transfer to plate/basket. Let cool for about 5 minutes.

Enjoy as is or with sweet and sour sauce. My mom made this sweet and sour sauce. I will have to learn how to make it and share with you some time. I’ve tried a couple of times and failed. Whomp whomp. I love to eat egg rolls with vermicelli noodles, vegetables like cucumbers and tomatoes. Herbs like basil, mint, cilantro and more. Oh, crushed peanuts with this dish is so good but didn’t have any 🙁

This is me trying to style food. 

Don’t be like me. Just throw it all in a bowl or eat with lettuce wraps. 

Bonus

If you have any leftover pastry, you can make a sweet treat with it.

Here is how: 

Cut pastry in half with kitchen scissors. Then cut into about 1/2 inch strips.

Transfer into deep fryer and let cook until golden brown. Remove from oil, drain oil as much as possible. Transfer to plate.

Sprinkle sugar or powdered sugar on top right away so that it will stick.

Enjoy as a yummy snack or dessert! 

xoxo, 


BEFORE AND AFTER: OUR DINING ROOM

BEFORE AND AFTER: OUR DINING ROOM

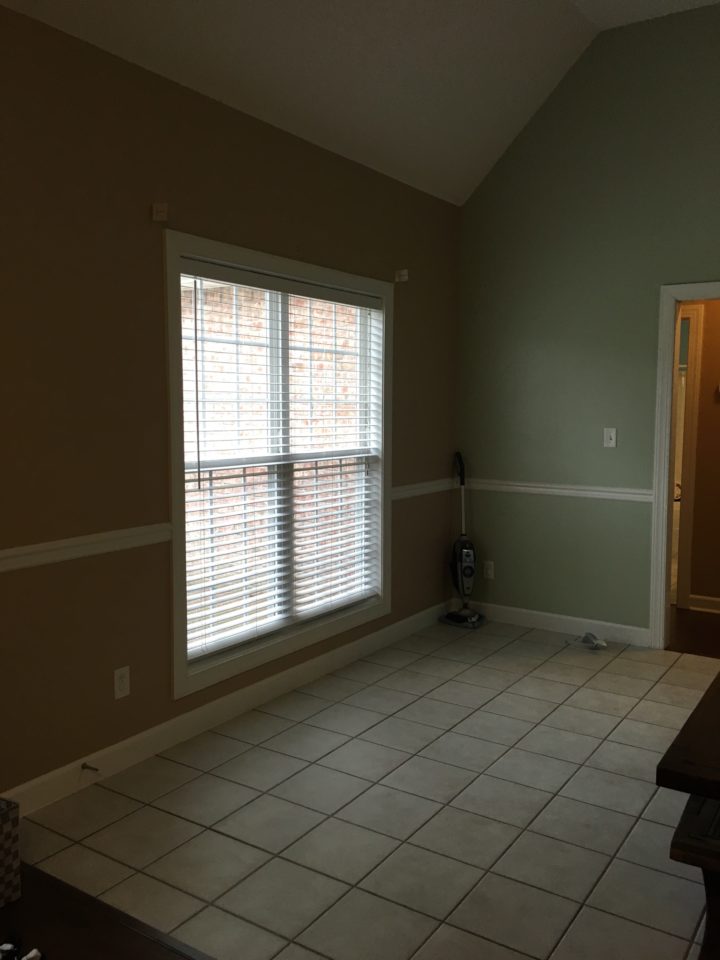
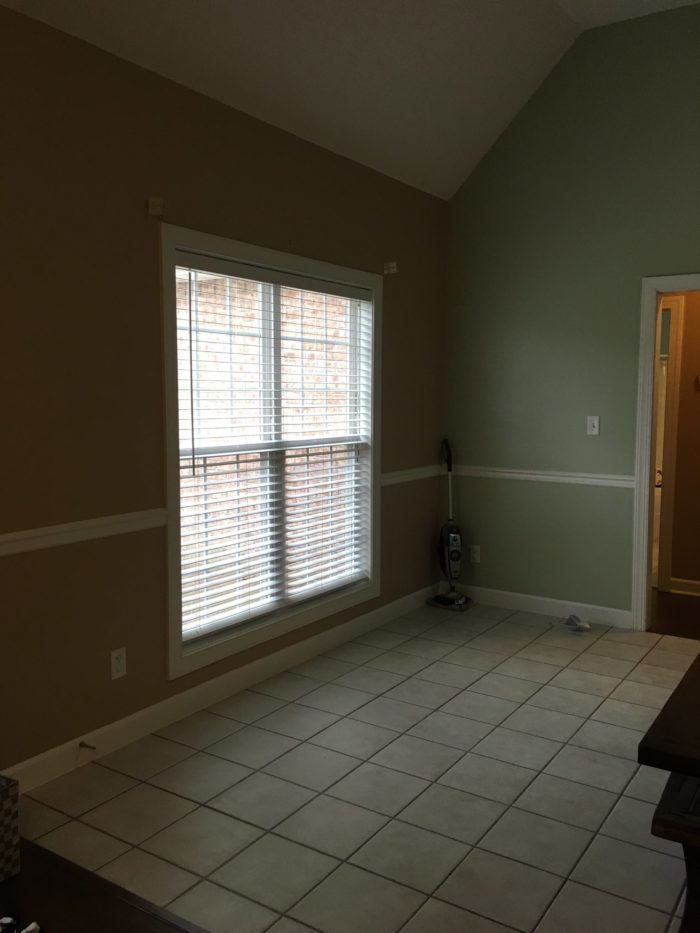
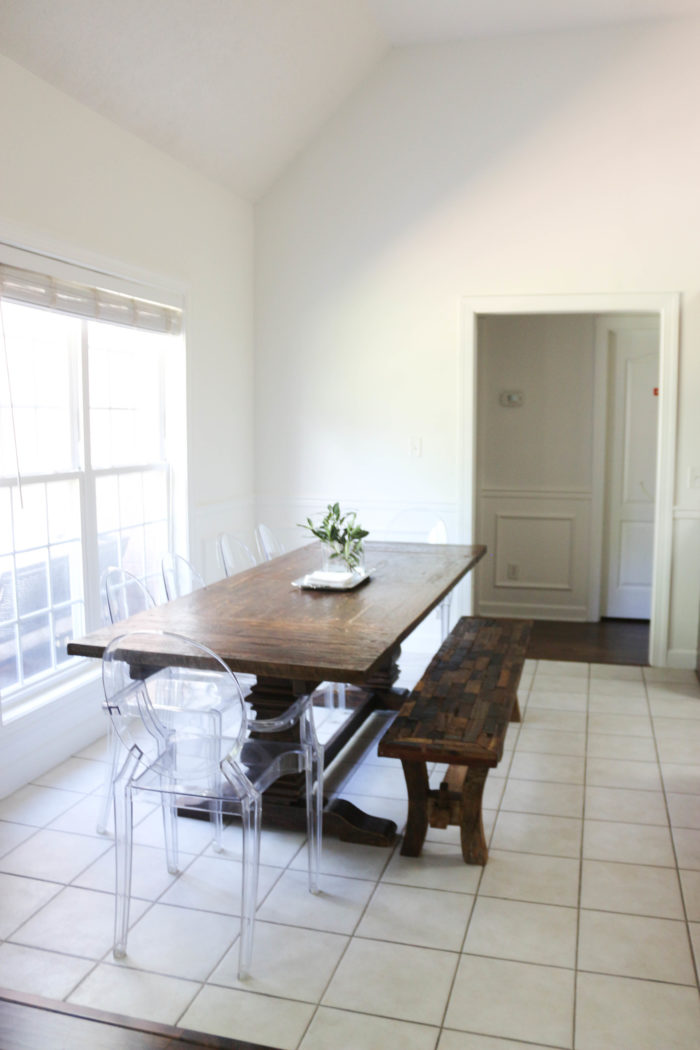
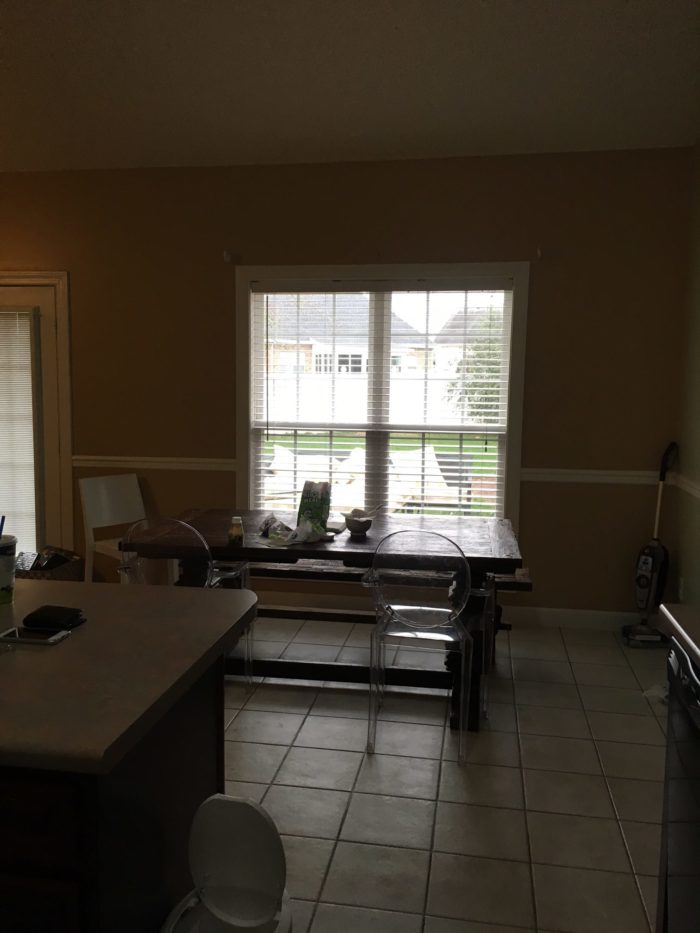
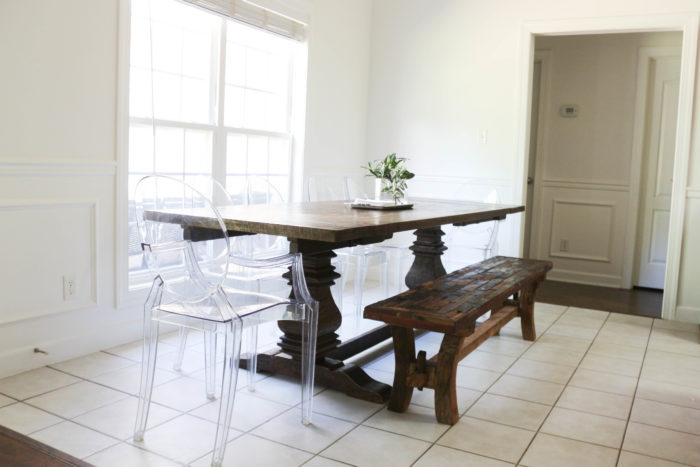
Our dining room was taupe and sage green when we moved in. We wanted to brighten up the space, so we painted the walls with Benjamin Moore “distant gray” in a flat finish. We also put up picture frame molding just for a little detail. We painted that and the trim in the whole house with Benjamin Moore “simply white”  in a glossy finish. We love the serene feel and simplicity. We enjoy many delicious meals in our dining room.

Progress: Added picture frame molding. 

Progress: New white paint lightens up the space. 

xoxo,


error

Enjoy this blog? Please spread the word :)